
In this 3 part series of tutorials, I'll be walking through and explaining the process of building an artificial neural network to classify images. I expect you to have a fundamental knowledge base in Machine Learning, Artificial Intelligence, or Neural Networks in order to follow along with these tutorials.
I am also using Octave as the implementation language, so I expect you to be fluent in that language as well if you wish to understand the code snippets. Octave isn't required since the syntax is mainly mathematical, as it is a matrix based language. However, you most likely will not understand the code snippets unless you have a basic understanding of Octave code.
This tutorial will be part 1 of 3 with this tutorial mainly concerning the initial setup for the entire algorithm. Not much code will be written here, but it sets us up for tutorial #2, which is the meat of the series where we will perform propagation to train our neural networks. Part 3 will focus on best practices and good tips for implementing neural networks, we'll cover error analysis ( what does our algorithm not classify well enough), plot learning curves to see if our algorithm is suffering high bias/variance, and introduce regularization to perform well on general examples. So, if you've read this far and the speech I just gave made sense to you, I'd assume you've met all the "prerequisites" and are ready to begin classifying images!
For this project, we'll be training an artificial neural network to determine whether a given picture is a fish,turtle, or crab. I chose these animals out of pure randomness, and feel free to pick any set of images you'd like. I have the files that I used available for download so you can follow along without having to modify the picture size/resolution.
If you've downloaded the images.zip file I provided, you should see a list of images like the following:
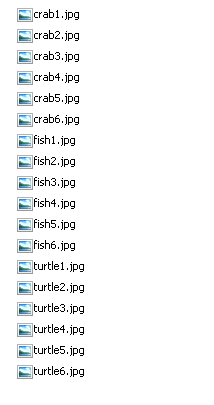
If you try to open any of these images, you'll have a very difficult time seeing them! This is because I've scaled the images down to 20x20 pixels and converted them from color to grayscale. I'll cover more about this conversion soon.
If you decided to download your own images for the classifier, all you'll have to do is use a program like paint or your favorite image editor and scale down the pictures to 20x20 pixels. Hopefully the program you're using has a built in function for converting RGB color scale to grayscale, but if not, this website allows you to convert your images easily. Or, if you're savvy, you can write a program to convert each image to grayscale, which is simple to do in Octave. If you have Octave installed and running, paste this code into your terminal and fill out the variables accordingly!( Again if you chose to download the images I've provided you can skip these function declarations, although I encourage you to at least read through them to understand what is going on).
function a = convertImages(colorImages,outputDirectory)

   a = 1;
   for i = 1:size(colorImages,1)
     tmpName = colorImages(i,:);
     [img, map, alpha] = imread (tmpName);
     [x, map] = rgb2ind (img);
     y = ind2gray (x, map);
     y = uint8((255 * y) / max(max(y)));

     imwrite(y, strcat(outputDirectory,tmpName),"Quality", 75);
     end;
endfunction;
Source: http://bsitech.wordpress.com/2010/08/06/converting-and-rgb-image-to-gray-scale/
colorImages should be filled out in a column vector format containing the file names of the images such as "fish1.jpg" or "myPicture.jpg". outputDirectory should be a string containing the directory to where you wish to store the converted images.If you're running on Windows, the string should end in "\\" to signal that it is a directory. For example, colorImages could be: ["fish1.jpg";"fish2.jpg"]; and outputDirectory could be "C:\\" if you want to store them directly into your C drive. If you're on Linux or Mac, you'll be happy to know that this doesn't apply since you can use the regular forward-slash to denote directories, such as "/home/Alejandro/"
Which ever way you chose to convert the images, we're now ready to get to the neural networks!
Currently, each image is stored in a 20x20 pixel format. However, we need a way for Octave ( or any programming language for that matter) to be able to represent this image in a single array/vector instead of a 2D array / matrix. The reason we would like to "stretch" the image from 20x20 to a single row vector is because we can group together several of these row vectors together into a matrix, where each row is a different picture. This makes the implementation of our algorithm much easier, since we can manipulate a matrix directly for all of our images instead of a complex, much harder to implement, structure. So, this 20x20 image will be "stretched" into a 1x400 pixel image. We won't actually perform this stretch on the images that are on disk directly, rather we'll perform this manipulation programatically within memory.
Now that we have the blueprints for the image processing, we need to start reading the images into Octave. I wrote this method, which you can copy at your leisure ( but if you use it in a document, please give credit where credit is due), that reads in the images given by a column vector, performs this "stretching", and returns a matrix where each row is an image.
function allImgs = readImages(fileNames)
 fl0 = fileNames(1,:);
 im0 = imread(fl0);
 im0 = double(im0);
 im0 = im0(:)';
 allImgs = [im0];
 for i = 1:size(fileNames,1)
   tmpName = fileNames(i,:);
   tmpFile = imread(tmpName);
   tmpFile = double(tmpFile);
   tmpFile = tmpFile (:)';
   allImgs = [allImgs;tmpFile];
   end;
endfunction;
fileNames should be a column vector of the names of the images such as "fish1.jpg","fish2.jpg",etc. If you understand Octave, this method shouldn't be very difficult to understand. However, if you're lazy (or as I like to say, savvy ;) ) you don't want to write out all the images manually! The zip file I provided has 18 different images [fish1-fish6, crab1-crab6, turtle1-turtle6] but if you notice, each image name has a common pattern of having appended the sequence of numbers [1,6]. So, I too wrote a method call that simplified the programming by adding all the numbers for me! Here is the code:
function namesMod = addNums(names,upTo)
namesMod = [];
for i = 1:upTo
   for j = 1:size(names,1)
    str = names(j,:);
    str = strcat(str,num2str(i));
    namesMod  = [namesMod;str];
    end;
end;
endfunction;
So, you can see here that all the strings in the names vector will have the values [1,upTo] appended to them. This way, we can just say:
names = ["fish";"crab";"turtle"];
upTo = 6;  % we have 6 examples of each animal
namesWithNum = addNums(names,upTo);
And now we have a vector with the values of "fish[1-6]", "crab[1-6"], and "turtle[1-6]"]. In order for us to read them, however, we need to add their extensions. Luckily, adding them manually won't be too difficult, or you can generalize the addNums method above to the following:
function addStr = addAuxillary(namesMod,strAdd)
 addStr = [];
 for i = 1:size(namesMod,1)
   str = namesMod(i,:);
   str = strcat(str,strAdd);
   addStr  = [addStr;str];
   end;
endfunction;
Which, you can see, just accepts a single string strAdd to append to everything in the namesMod vector. So, we can just call the following:
imageNames = addAuxillary(nameWithNums,".jpg");
% namesWithNums was computed above
This seems like a lot of work just to get the names of 18 different files, no? We could have saved time and written down the file names by hand! Sure, this is true for this particular case of 18 files ,but these functions will benefit you in the future if you do more work with Neural Networks where your training sets may be 5000 images! Surely the programming effort will be well worth it.
Now, with all the preliminaries out of the way, it will be code and mathematics from here on in so brace yourselves =)
The first thing we need is to read in the image, so let's write some Octave code to read in the images ( I provided a readImages function above). You should cd into the directory containing the images if you haven't already done so.
fileNames = ["fish";"crab";"turtle"];
upTo = 6; % go up to 6
filesNum = addNums(fileNames,upTo);
extension = ".jpg";
imageNames = addAuxillary(filesNum,extension);
This will store the image names into the variable imageNames. Go ahead and print it out to see the results. Here are the results on my machine.
 |
| Successful imageNames Construction! |
Now we can read them into octave, using the readImages function I provided.
X = readImages(imageNames);
If you understood the readImages function correctly, you'll realize it reads the pixels of each image, given by the vector imageNames, and "stretches" them out to the 1x400 size I mentioned earlier. This makes it easy to group them together into a matrix like the following:
================= Pixels of Image 1 =======================
================= Pixels of Image 2 =======================
.............................................................................
================= Pixels of Image m =======================
Thus, when we assign X = readImages, this matrix above is held by the variable X.
For notation purposes, m will represent the number of images we have and n will represent the number of pixels represented in each image. In this example, m = 18, since we have 18 pictures, and n = 400 since our pictures are described by 400 pixels.
Now would also be a good time to discuss why this tutorial makes use of grayscale images instead of normal RGB colors. If you're familiar with RGB, you'll know that a pixel essentially has 3 different values associated it with each with a value in the range [0,255]. Each one of these values represent how much Blue,Red, and Green a pixel represents with 255 representing full and 0 representing empty. With grayscale, however, each pixel is represented by a single digit also on a scale of [0,255] which represents the intensity, or how bright that image is with 255 being white and 0 being black. The interesting thing to notice here, is that if we read an image that is in RGB format in Octave, we'll get a 3 dimensional array, which is a tad difficult to visualize, but you can think of it like a Rubiks cube, where each layer represents the next color readings. This wouldn't necessarily be difficult to implement in Octave, but it is much easier to deal with grayscale images since each pixel is only represented by a single number.
I also mentioned earlier that the images were scaled down to 20x20 pixels. This seems like an obscurely small image, why would we use it? If you're familiar with Neural Networks, you'll know that each neural network has an input layer. **Spoiler Alert ** The input layers for our neural network will be the pixels of the image! We'll cover more about input layers in the next tutorial of this series but, in essence, each pixel of the image will be a "feature" that the neural network will take into account. Having a 20x20 pixel image gives us 400 features per picture. Even with this small amount of features, the neural network performs extremely well, but that's not the source of our concerns. If a 20x20 pixel image has 400 features, a 100x100 pixel image is going to contain 10,000 features! And a 100x100 pixel image is still relatively small! The reason this is such a big deal is because it can become extremely computationally expensive to have 10,000 features to train and for reasons I'll explain in the next tutorial, this would mean we would have to hold in memory, take derivatives, and perform calculations on anywhere from 80,000 to 160,000 numbers for a well-trained neural network. Clearly, we don't need this much computation to have a simple image classifier, which is why I opted for 20x20. It's computationally inexpensive yet still provides a wealth of features to the neural network to classify fairly well.
Hopefully you're still following me! If you're still here and alive, congratulations! From here on in up until the last tutorial, it's all about fun!
We now need a way to label our data. Neural Networks are a supervised learning algorithm, and thus need labeled data. Neural Networks also are great for multiclass classification, so we can have multiple labels to represent our data. For the purposes of this tutorial, 1 = Fish , 2 = Crab, 3 = Turtle. So, to label our data, we will need to create a seperate column vector, of size mx1. Each row, r , will represent the correct classification for image r.
Because of the layout of our images: fish,crab,turtle repeating, we can easily create the vector that will represent the classifications.
y = [1;2;3;1;2;3;1;2;3;1;2;3;1;2;3;1;2;3];
The images alternate between Fish ( class 1), Crabs (class 2), and Turtles( class 3), thus we can create the vector y in such a manner.
Great, we have our images in memory, we have our classifications setup, all we need to do now is implement the details of our neural network,perform forward propagation, backpropagation, optimization, test out new images, error analysis with related components, and regularization, all of which will be covered in the next few tutorials :)
Hopefully you were able to follow along, as this is the most trivial and easy to follow tutorial for the series. In the next tutorial, we'll cover forward propagation, back propagation, and optimization algorithms!
No comments:
Post a Comment